Creating an assessment from your template
1. After setting up your template following the Assessment System Template instructions, make a copy of your first assessment.
2. Decide what questions you will be using for the assessment.
4. Here you will be adding questions and rearranging them if needed.
 5. When you are finished entering in your questions, click on "more actions" and then choose "edit confirmation".
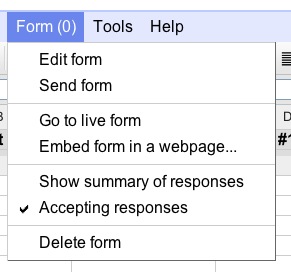
6. Click "Go to live form" in the Form menu of the spreadsheet.

7. You are now done you just need to share the form link so students can access it.

Advanced Features:
Overview Video
Initial Template Instructions (video)
Advanced Assessment Tools
 * * | Follow me: @mrschwen on Twitter See updates and applications on my blog: mrschwen.blogspot.com Staff development available. |
1. After setting up your template following the Assessment System Template instructions, make a copy of your first assessment.
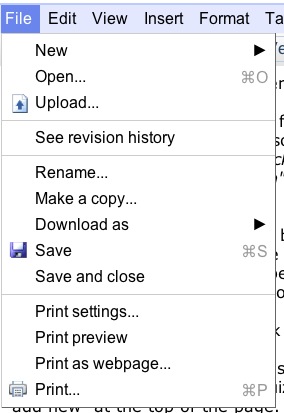
- Go to the File menu, then choose Make a Copy. Rename it so that it describes what the assessment will be for (instead of just "quick quiz template copy")
2. Decide what questions you will be using for the assessment.
- If you have a hard copy already you don't need to retype the questions, you could just have the question numbers in the form students will be using. They would just have to have a paper copy in front of them that they would be looking at. This is a great way to use an electronic system and to not have to recreate your current tests.
- Think about what question types you would like to use (multiple choice, short response, choose from a list, etc). For the template to be able to grade the question for you you wouldn't be able to do more than one word answers in the short response section.
3. After renaming your copy, click on the Form menu and choose Edit form.
4. Here you will be adding questions and rearranging them if needed.
- You can add assessment items by clicking on the Add Item button.
- Remember to not eliminate the first items that came with the template as this will affect the template working correctly.
- See initial instructions on the form edit page specific to the template you are using.
- If you check "Let everyone see response summary" everyone will see a graphic representation of all the answers that were entered in.
- In the text box above you can change any of the text to be more fitting for you personally. I like to enter in the solutions here so students can have instant feedback on what they entered in.
- I also give a reminder that if they didn't get the correct answer they should go back and try to rework it correctly.
- When you're finished close the window if "save" is not able to be clicked. In many cases Google Docs saves automatically.
6. Click "Go to live form" in the Form menu of the spreadsheet.
- Take the assessment yourself using the correct answers from the answer key.
- These will appear in the "Form Data" tab of the spreadsheet after you submit it.
- Paste the answers into row 1 in the yellow cells below their appropriate question label. Don't change any other cells in that row. (There is now a script option in the "assessment menu" that will do this step for you along with setting up the email, clearing duplicate responses and clearing old responses--updated Spring 2012)
7. You are now done you just need to share the form link so students can access it.
- This could be through Twitter, your class webpage, moodle, etc.
- Go to the Form menu. Click on "go to live form" and then copy the address from the address bar. Put this into where you want students to be able to click onto it.
*I’m contemplating putting a QR code on each paper test that will link directly to the form for students using web-enabled devices that have a camera.
Advanced Features:
Overview Video
Initial Template Instructions (video)
Advanced Assessment Tools
Creating an assessment from your template Updated July 5th, 2011 Andy Schwen
MrSchwen's Google Forms Assessment System by Andy Schwen is licensed under a Creative Commons Attribution-NonCommercial-ShareAlike 3.0 Unported License.Based on a work at mrschwen.blogspot.com.
